|
|
Post by coopdad on Feb 1, 2010 9:29:56 GMT -5
I have learned so much on this site that I decided this was a good way to give a little back. This is my tutorial on how to build one of those t-shaped lug wrenches for 1/24 (or 1/25) scale. Not being able to find one for sale I decided to make one. You will need two sizes of styrene rod: .035" (#220 from Evergreen) and .0625" (#222) 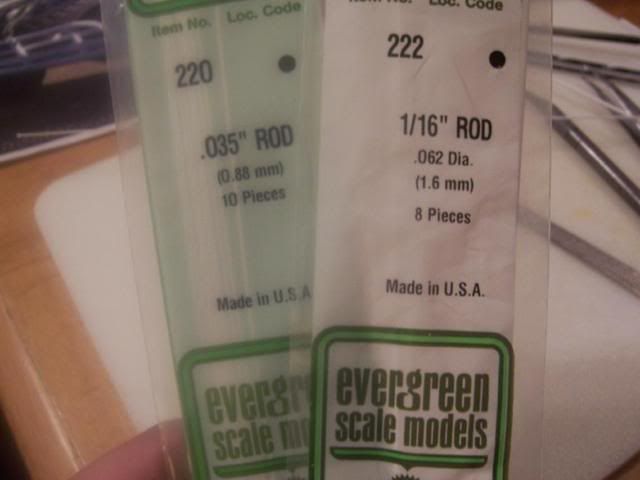 You will also need plastic weld (glue).  Start with the big (222) rod and use your knife to "sharpen" the end to almost a point.  Clean up the end using a fingernail file. Also, file off the point off flat. This is where it will attach to the other rod.  Then cut the end off just past the angled part. This is the part the the lug nut would go into on the real wrench. 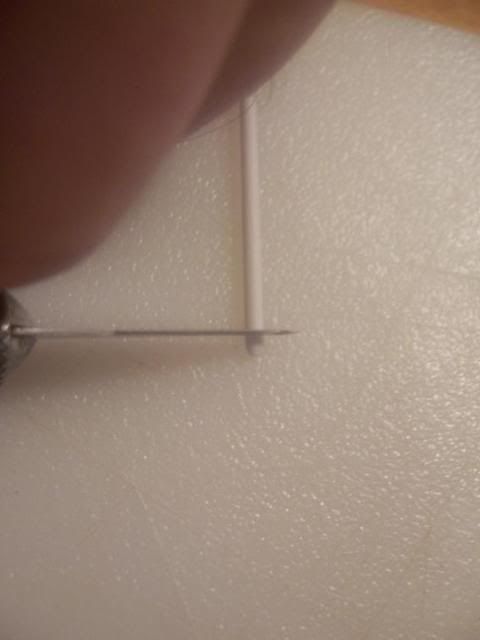 Now make three more. Next glue one to the end of the small rod.  After it dries cut the rod to about 3/4" long and attach another one to that end giving you this bar: 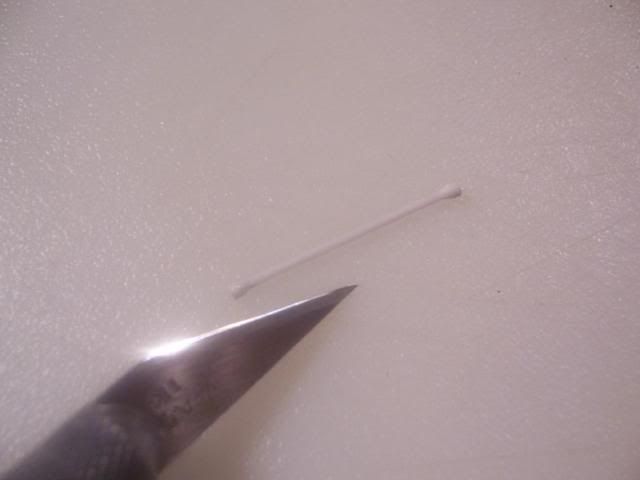 Make another bar. Measure for the middle of the bar and use a circular file to indent it. Do this on both bars.  Now glue the two bars together, indent to indent. Do your best to make it a perfect "t" with all angles the same. 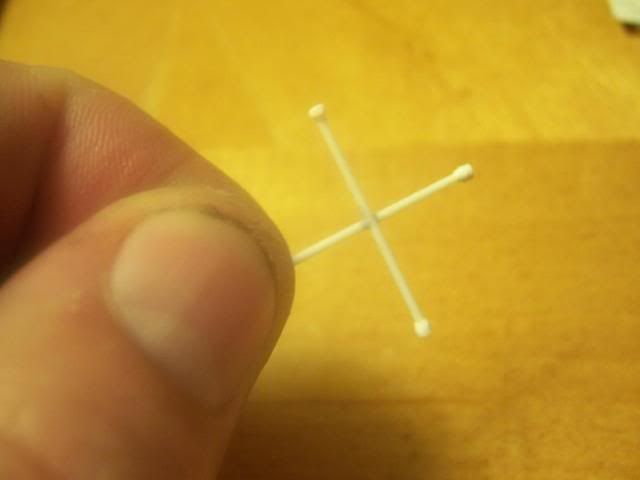 A trick I found is that if you use a lot of glue and really squeeze the bars together hard, the bars will melt and create a little area looks just like the welding blobs on the real wrench. After a quick coat of silver paint you will have a realistic lug wrench.  You could even use a drill to put tiny holes in the ends to add a little more realism to the part though it is not required. This is my first how-to (of hopefully many). Let me know if I can answer any questions. Good luck and happy fabbing. John |
|


