Post by coopdad on Feb 1, 2010 10:11:09 GMT -5
The basic process is pretty easy (but perfecting it takes practice):
1. make/find a part to cast
2. make a mold of it
3. then cast the part.
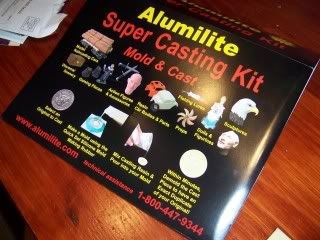
I used a all-in-one kit available at local hobby stores/Michaels/Hobby Lobby for about $70. It has all the stuff needed to cast parts.
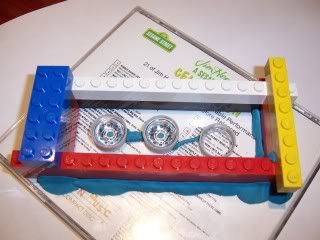
In this example I cast a set of wheels that I modified for wider tires. You stick the part to a flat surface (a CD case in my example) using glue or the clay that comes in the kit. Then you need to build a box around the part to hold the molding RTV material... Legos work great as they are handy and you can make just about any size box.
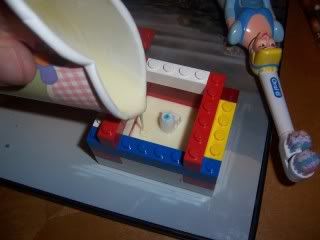
Then mix the molding RTV liquid according to the kit's directions and slowly pour into the lego box. To help reduce the introduction of bubbles into the mold you should pour far away, not on the part. I also use a "bubble reduction device" (my daughter's old electric toothbrush) to vibrate the bubbles to the top.
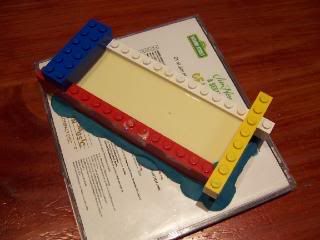
After a few hours (or overnight depending of the RTV you have) the mold will be hard and the parts can be removed.
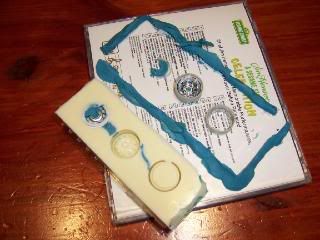
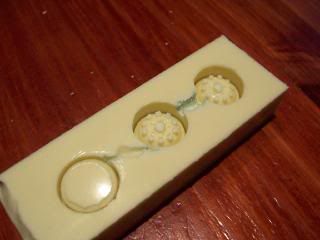
Now on to the casting. A very similar process... mix the casting resin up according to the directions and pour into the (microwave warmed) mold. Again, don't pour directly into the mold, let it run in because it helps limit the number of bubbles in the final part.
Sorry, no pix of the pouring as the resin in the kit hardens VERY quickly (less than a minute). After the resin if fully hardened, you can remove your new wheels!
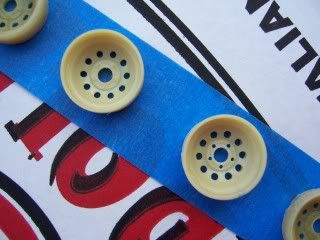
This process is a one-part mold since the there is only one part to the mold. A two part mold can also be made for complicated, 3-D parts. The process is the same only you suspend the part above the flat surface, pour the first mold and let it harden. Then coat it with a special, nonstick liquid (also supplied in the kit) and then pour the second half of the mold.
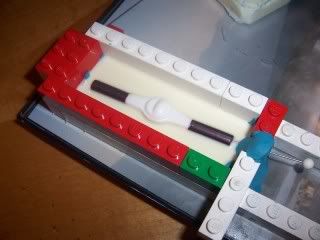
I have found that making small parts like seats, axles, wheels, etc. using one part molds is very easy. By doubling the number of molds increases the complexity of the process... you have to plan for where you will be pouring in the resin. And some shapes will require you cut in air vent holes or huge bubbles will show up in you final part. Also, the larger the part the more difficult it becomes. I tried to cast a car body and the results are marginal at best. I found that so much molding RTV is needed that it became very expensive very quickly.
I have also found that Hobby Town occasionally has coupons that will help reduce the cost of the kit. Watch the newspapers.
Keep in mind, this "tutorial" is a simplified overview. There are additions to the process that will result in cleaner (bubble-free) results. Also keep in mind, I am no expert, but after 20-30 molds I feel pretty comfortable (though still learning.)
Hope this helps.
John
1. make/find a part to cast
2. make a mold of it
3. then cast the part.
I used a all-in-one kit available at local hobby stores/Michaels/Hobby Lobby for about $70. It has all the stuff needed to cast parts.

In this example I cast a set of wheels that I modified for wider tires. You stick the part to a flat surface (a CD case in my example) using glue or the clay that comes in the kit. Then you need to build a box around the part to hold the molding RTV material... Legos work great as they are handy and you can make just about any size box.

Then mix the molding RTV liquid according to the kit's directions and slowly pour into the lego box. To help reduce the introduction of bubbles into the mold you should pour far away, not on the part. I also use a "bubble reduction device" (my daughter's old electric toothbrush) to vibrate the bubbles to the top.


After a few hours (or overnight depending of the RTV you have) the mold will be hard and the parts can be removed.


Now on to the casting. A very similar process... mix the casting resin up according to the directions and pour into the (microwave warmed) mold. Again, don't pour directly into the mold, let it run in because it helps limit the number of bubbles in the final part.
Sorry, no pix of the pouring as the resin in the kit hardens VERY quickly (less than a minute). After the resin if fully hardened, you can remove your new wheels!

This process is a one-part mold since the there is only one part to the mold. A two part mold can also be made for complicated, 3-D parts. The process is the same only you suspend the part above the flat surface, pour the first mold and let it harden. Then coat it with a special, nonstick liquid (also supplied in the kit) and then pour the second half of the mold.

I have found that making small parts like seats, axles, wheels, etc. using one part molds is very easy. By doubling the number of molds increases the complexity of the process... you have to plan for where you will be pouring in the resin. And some shapes will require you cut in air vent holes or huge bubbles will show up in you final part. Also, the larger the part the more difficult it becomes. I tried to cast a car body and the results are marginal at best. I found that so much molding RTV is needed that it became very expensive very quickly.
I have also found that Hobby Town occasionally has coupons that will help reduce the cost of the kit. Watch the newspapers.
Keep in mind, this "tutorial" is a simplified overview. There are additions to the process that will result in cleaner (bubble-free) results. Also keep in mind, I am no expert, but after 20-30 molds I feel pretty comfortable (though still learning.)
Hope this helps.
John


