|
|
Post by ddlova on Feb 14, 2010 13:49:26 GMT -5
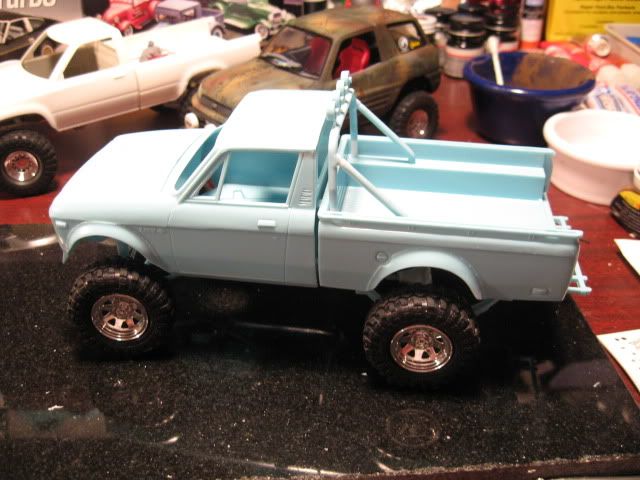
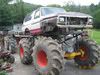
here are a few pics of the latest project i'm working on. this is Monograms old High Roller kit that i just recently got. so far just some clean up and assembly of the chassis. i modified the front axle to have poseable steering too.  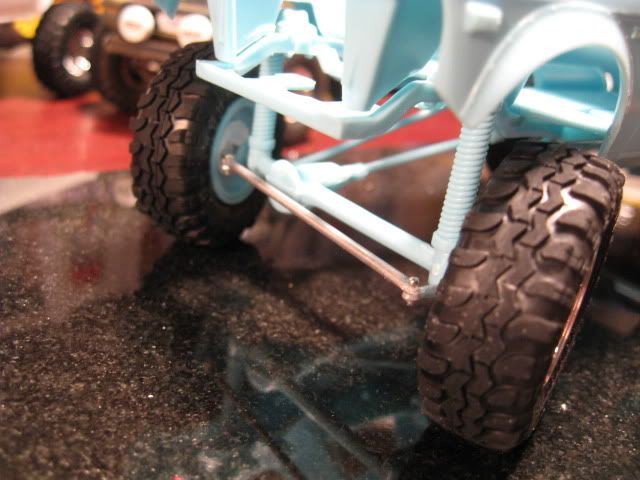 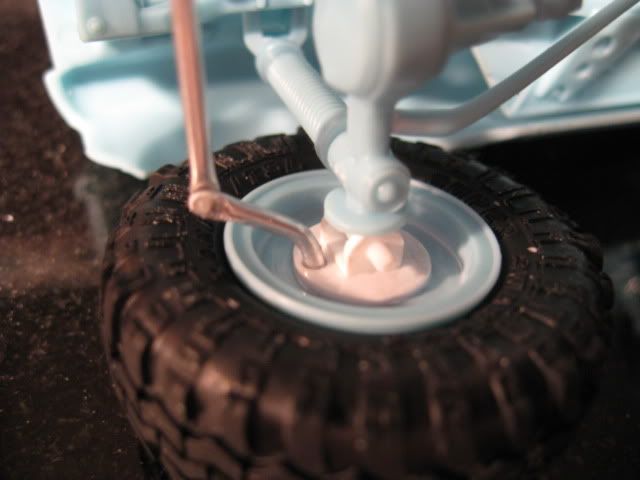 Dave |
|
|
|
Post by ddlova on Feb 16, 2010 1:09:09 GMT -5
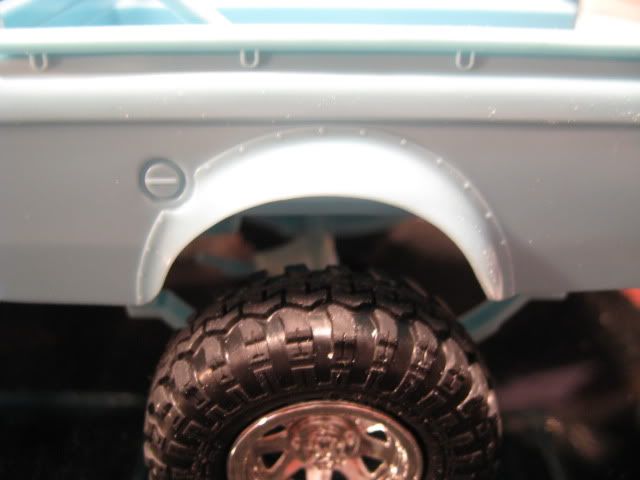
a small update, but an update none the less! i made up a panhard bar and mounts for the front suspension. the kit doesn't have that detail and i thought it should have it. the bars that go from the axle to frame were a little weak as well where they attach to the axle so i added some small supports to reinforce them. the hollow topsides of the front and rear axles were filled with Tamiya's epoxy putty.  i kind of wish i had made the steering higher up for better clearance. seems like where it is now it would be easily damaged on trails? Dave |
|
|
|
Post by jeffs396 on Feb 16, 2010 1:44:28 GMT -5
"Luv" that lil truck Dave! Gotta find one someday ;D
Your steering setup looks good...that's about where it would've been from the factory. Frequently used trail rigs convert to high-steer knuckles sometimes to keep the rocks from bending steering components.
Keep up the good work!
|
|
|
|
Post by wtsf150 on Feb 19, 2010 14:16:01 GMT -5
Gotta love the Luv the steering looks fine if i may give some tech advise and by now means is this to knock your work the track bar and the drag link should both go in the same direction and stay about the same angleof each other i like your idea of this build cant wait to see more
Willie
|
|
|
|
Post by ddlova on Feb 20, 2010 11:23:14 GMT -5
|
|
|
|
Post by coopdad on Feb 21, 2010 19:02:18 GMT -5
That dash is sweet!!!
|
|
|
|
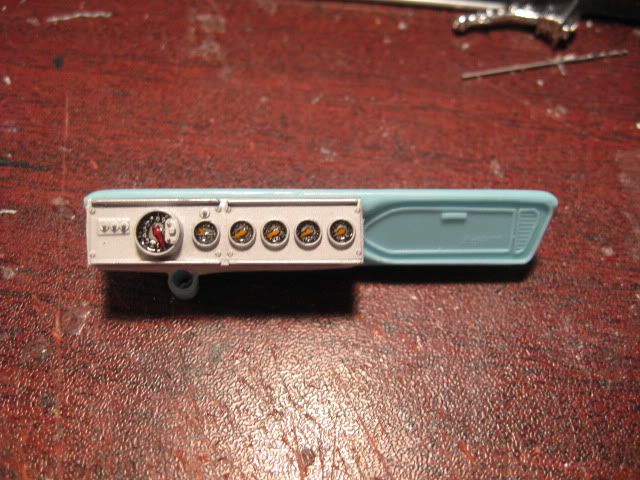
Post by ddlova on Feb 28, 2010 17:17:12 GMT -5
i put the F350 away for a little while so i can get back to this thing. i got the interior pieces painted, there arent many of them! after that it was just getting it together and adding some details to make it more interesting. a photoetched radio face, a photoreduced magazine and model kit and that's mostly it. i flocked the floor in dark blue because i'm running out of black and the truck will be painted blue of some sort later. 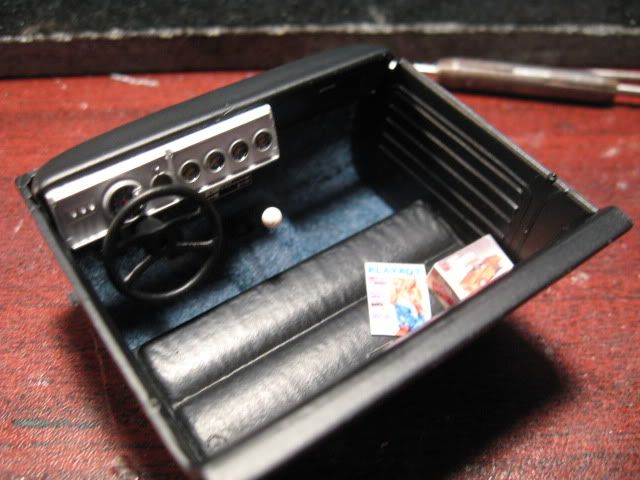 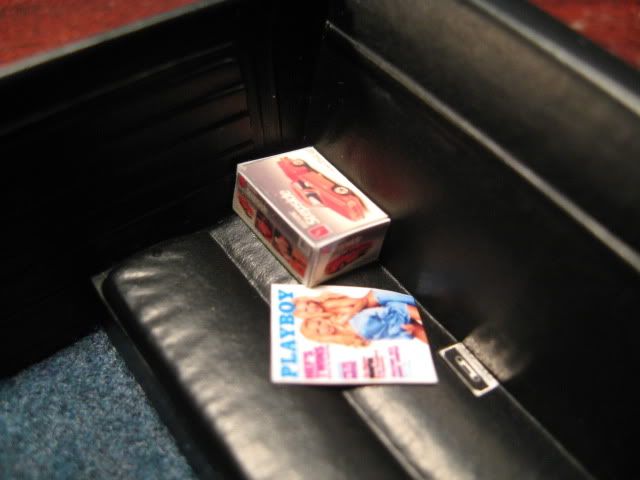 Dave |
|
|
|
Post by Big Ed on Feb 28, 2010 22:12:12 GMT -5
Hey Dave. Small steps is what we all build in here, so you fit right in. Love this little pick-up. The instrument cluster panel looks slick...interior "junk" ain't bad either.
|
|
|
|
Post by ddlova on Mar 1, 2010 10:29:25 GMT -5
alright, last night i got the engine painted and assembled. nice little small-block i swapped the valve covers for those from a Monte Carlo since they looked like those generic chrome ones you can find just about everywhere. the intake manifold and carb are from the parts box. i drilled the heads at an angle to represent angle plug heads and used a Replicas and Miniatures pre-drilled distributor cap and base. 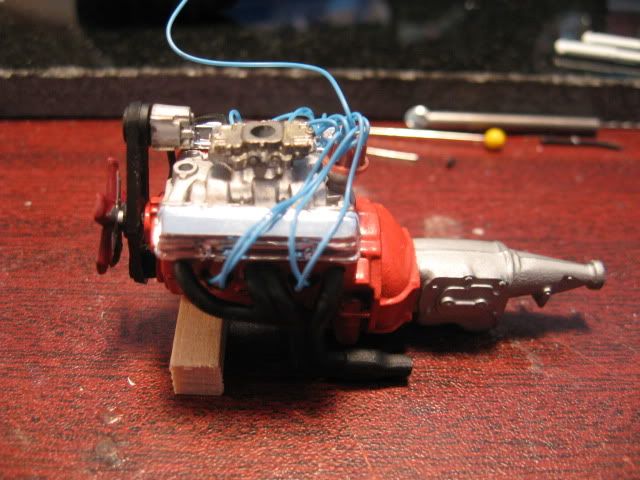 Dave |
|
|
|
Post by wtsf150 on Mar 1, 2010 18:44:41 GMT -5
I think i still have that issue the interior stuff looks cool and nice work on the engine
Willie
|
|
|
|
Post by ddlova on Mar 2, 2010 0:25:28 GMT -5
i made the exhaust system up for this thing this evening. i used some 3/32 tube, some rectangular box tube and sheet plastic. i made the mufflers to look like the early style Flowmasters.  ![]() img.photobucket.com/albums/v720/davezinn/Chevy%20Luv/ZSRav4083.jpg[/IMG img.photobucket.com/albums/v720/davezinn/Chevy%20Luv/ZSRav4083.jpg[/IMGthe bed came in the mail today from a fellow modeler. it's the stepside bed for the Luv kit, but i think i'll use it on something else, something not Chevy! i have an idea all ready for what i think it will be perfect on. Dave |
|
|
|
Post by ddlova on Mar 10, 2010 20:01:21 GMT -5
i thought i had updated this thread but i guess not. the truck is now painted and well on it's way to being finished! some challenging fit issues have come up including a pretty big issue with the body and interior tub. during mock-up everything seemed okay but when i went to put the body, interior and chassis together it didn't fit. some serious grinding with my Dremel was required on the dash and side panels as well as the bottom edge of the windshield. even then it wasn't perfect but workable. i glued the cab to the floor and then wired the front inner fenders to the frame at the front. 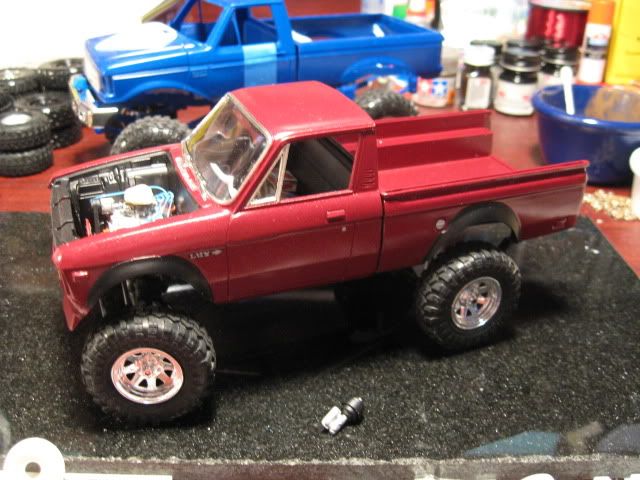 i found out this afternoon that the front bumper has some issues as well and ended up slotting the holes in the front valence to get it aligned right. the holes in the valence are in the right places but the locating pins on the back of the bumper are offset to one side? it's almost there though! Dave |
|