

Post by nocky on Apr 28, 2011 4:29:57 GMT -5
Hi all
In response to my post in the Complete 4x4 section of this forum (Modified Ford F250) I was asked to post a "how to" on fitting SoReal wheels (1:24th) to 1:18th scale trucks.
I have used the same method on Maisto Jeeps and Ertl/Anson Dodge Rams (all 1:18th scale).
As a "bonus" this also contains a how to on lifting !:18th scale Maisto Jeeps (works with other 1:18th scale models too).
I originally posted this on the diecastxchange website.
The short version is that you cut the axle stubs off, drill a hole in the "axle mount" then put the wheel on and use a screw to hold it there.
The wheels are from the SoReal company and are 1:24th scale. They do however look good on a 1:18th scale model. There are two main types of wheels that you can buy from SoReal:
Note: I don't think you can buy directly from the website. I got my from the Ebay retailer Trevors Toybox and found them good to deal with.
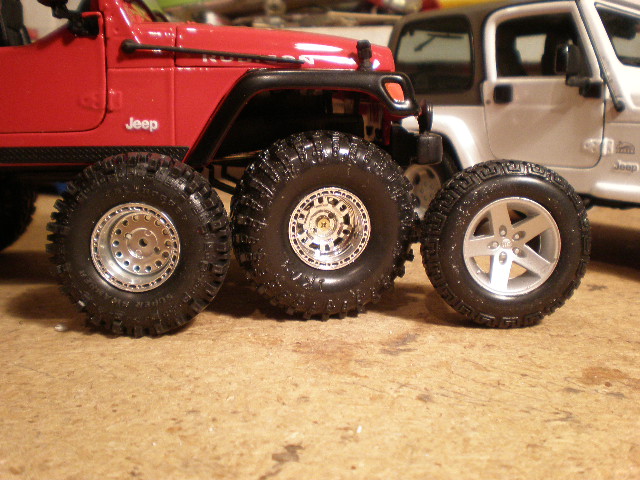
SoReal IROK Super Swamper on Weld Mountain Crushers (fitted to Jeep in picture below) and Interco TSL Bogger Swampers on BeadLock Wheels (to the left of the fitted wheel)
The dimensions are (from the SoReal website)
SoReal IROK Super Swamper on Weld Mountain Crushers
Height - 1.929"
Width - 0.82"
Axle Mount - 0.0885"
Axle - 0.19"
Brake rotor inside - 0.57"
Interco TSL Bogger Swampers on BeadLock Wheels
Height - 1.75"
Width - 0.67"
Axle Mount - 0.0885"
Axle - 0.19"
Brake rotor inside - 0.57"
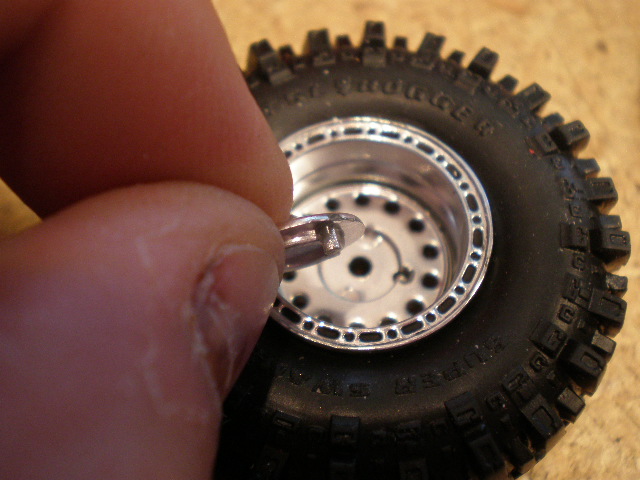
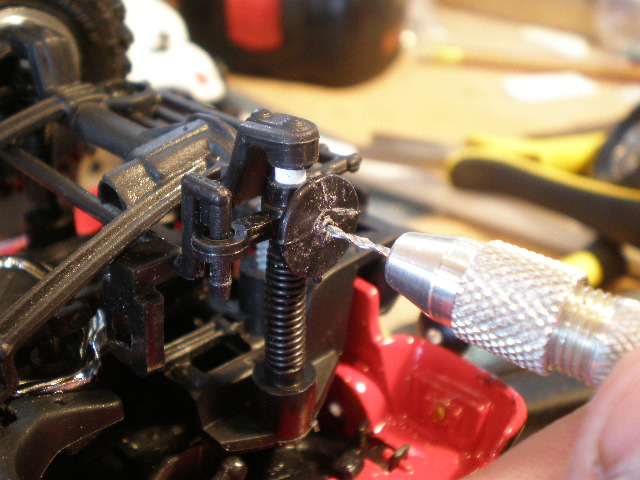
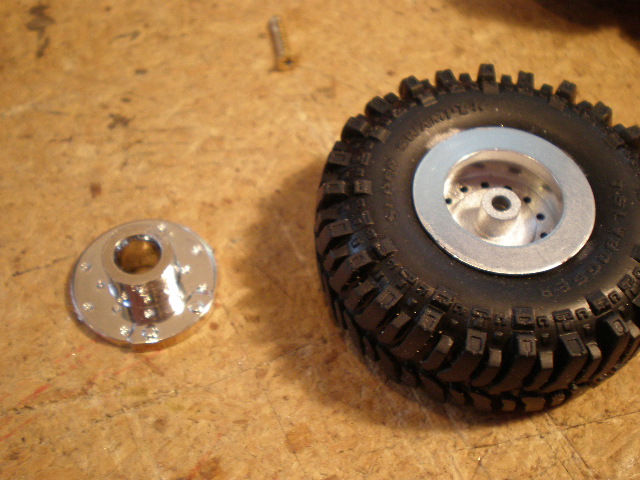
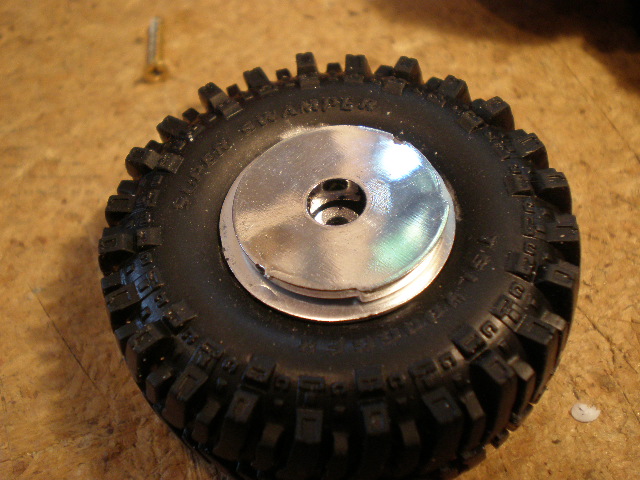
The wheels have a hole through the centre and the "hub cap" can be removed by pushing a rod through the hole.
Here is me holding the "hub" after it has been removed
This is how to fit the wheels to an axle "system" where the wheel can be pulled off an axle stub as you might find in a Bburago, Maisto or Ertl type model (and many others too).
I will be showing how I fitted the wheels to a Maisto Jeep Wrangler, but you can use this method on other models as well. Some models in which the wheels are held on by screws, you may not need to modify the axle at all. For example on a Universal Hobbies Landrover model.
Firstly you need to remove the wheel. In a typing axle stub type system this usually means carefully pulling the wheel off by hand or prising it off with two screw drivers held behind the wheel. The main thing is not to snap the stub off, though in this case I am going to remove the stub anyway. If it does snap off in the wheel, you may not be able to use the wheel again or you will need to drill the stub out of the wheel.
In this case (for demonstration purposes) I removed the wheel from my other Jeep, but the center "tube" did not come off.
So, here the wheel has been removed from the rear axle:

Showing you where to cut with the saw. You want to leave the disk on the end of the axle:
If needed, "clean up" the cut to make it flat.
Then you drill a hole for a screw to go into. You need a screw long enough to go through the wheel hole into the axle and thin enough also to go through the hole. I am using screws that are a 1\2 inch long by 2mm wide. I drilled a hole about 1-1.5mm wide so the screw has some grip. You also should aim to drill in the centre of the disk.
I used a hand drill:
Hole in front axle. Be careful not to drill too far!:

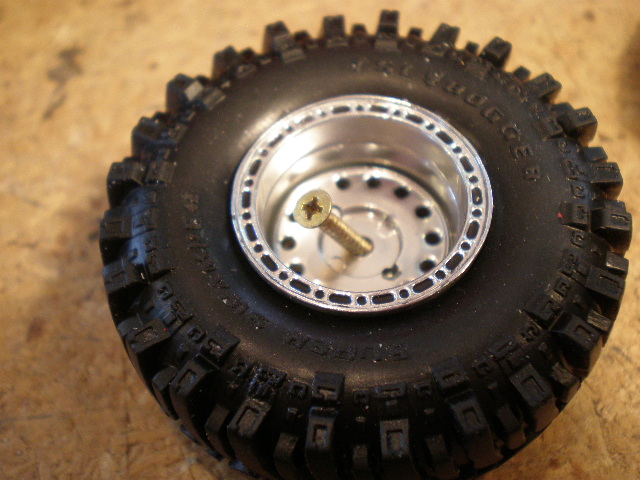
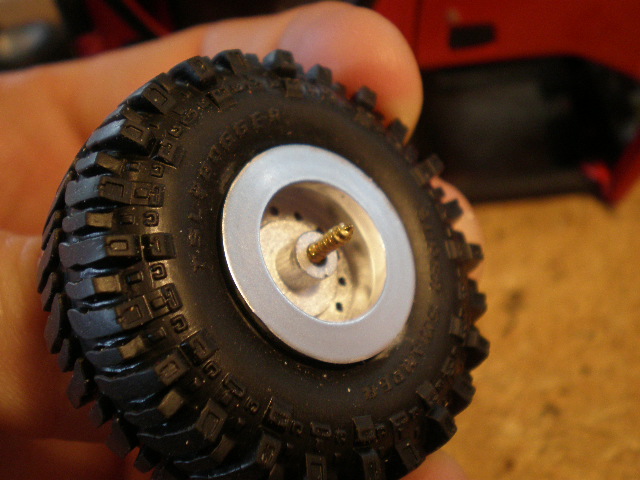
Out the screw through the hole in the wheel:
Back of wheel for reference:
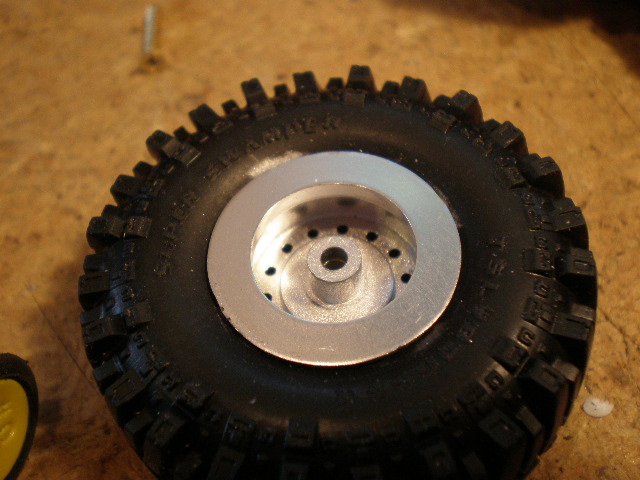
I have some brake discs from another set of custom wheels and these fit nicely into the back of the SoReal wheels. I am using them to help fill in some of the space at the back of the wheel, but they are not required.

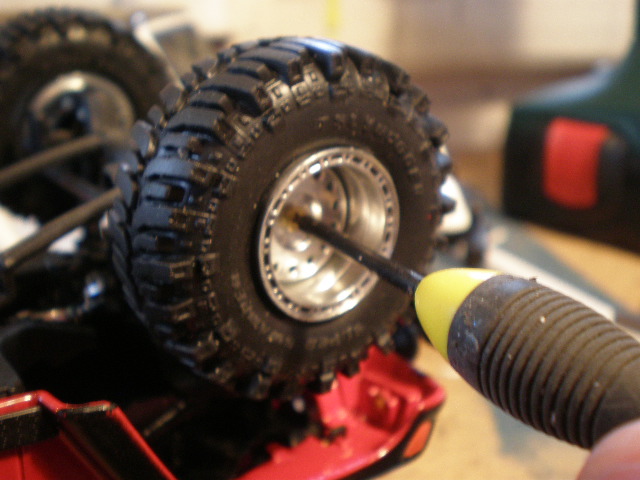
Now screw the wheel onto the axle:
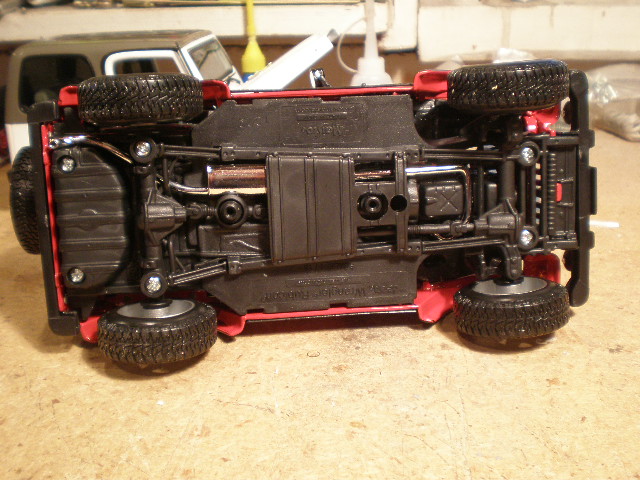
DO that another three times and you get something like this:

Now to lift the Jeep a bit (the photos above show it already lifted)
Firstly, a basic lift on a Maisto or similar "spring fitted" model can be done by just swapping out the screws that hold the axle parts on with longer screws and either fitting spacers and keeping the same set of springs, fitting two sets of springs (doubling them up) or fitting larger springs.
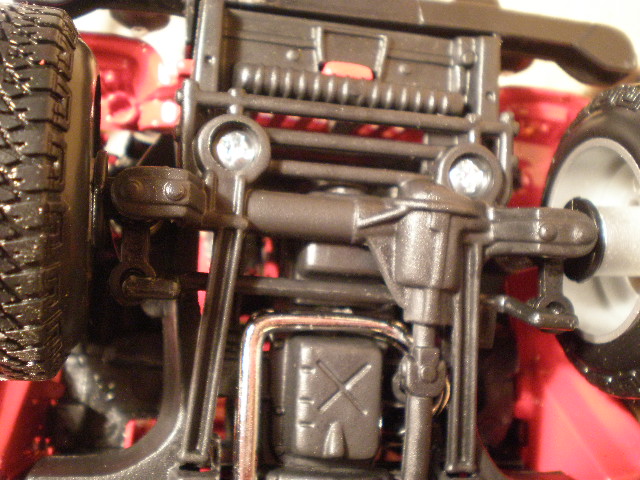
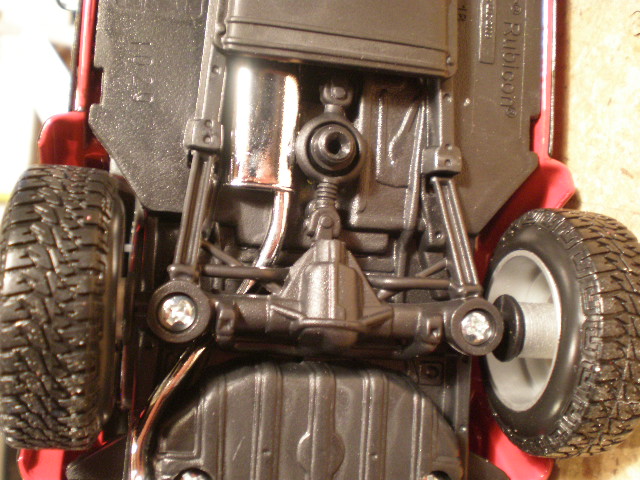
In these pictures you can see the four "chrome" screws holding the front and rear suspension on:
Front
Rear
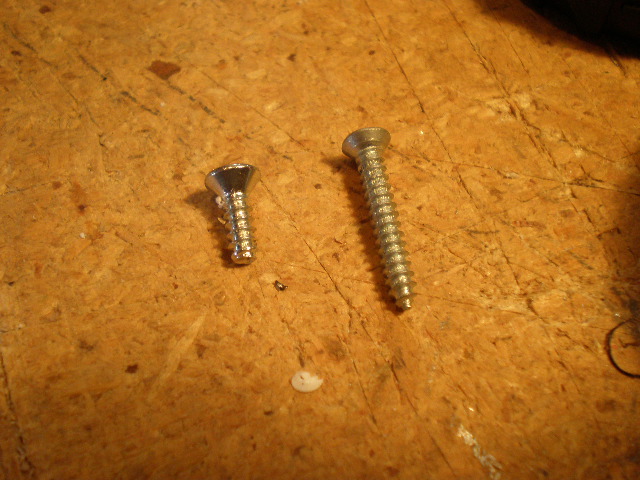
The original screw is on the left and the replacement screw is on the right:
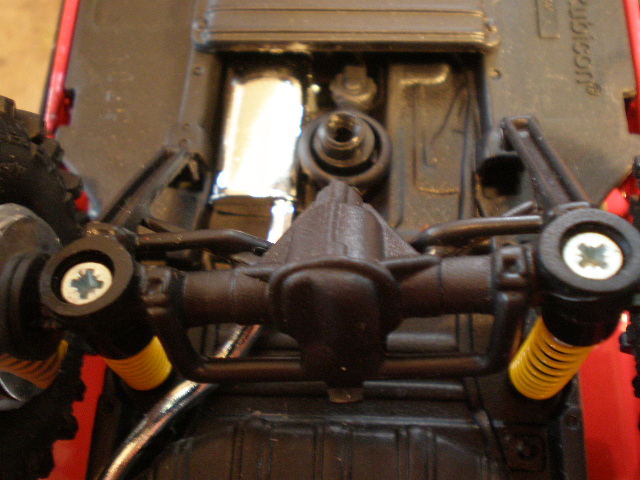
Here is the rear suspension with the replacement screws and new longer springs:
And the front with the same screws and different springs:
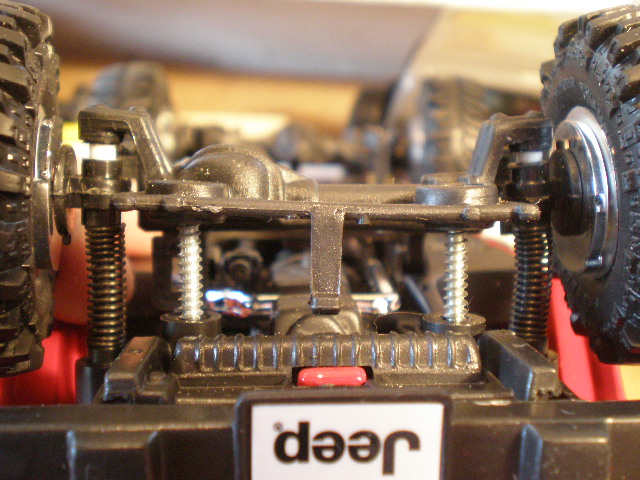
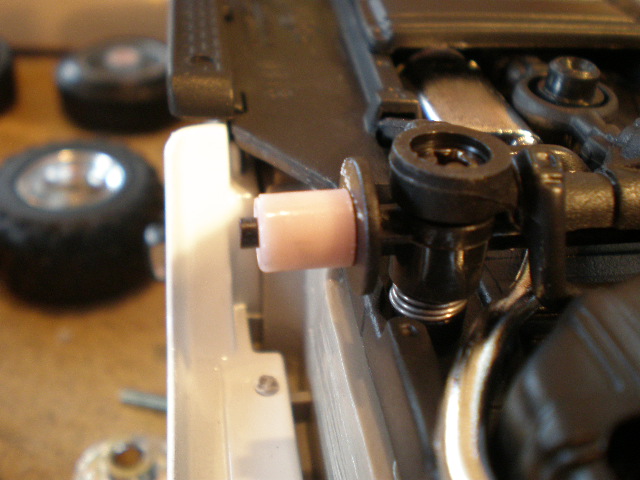
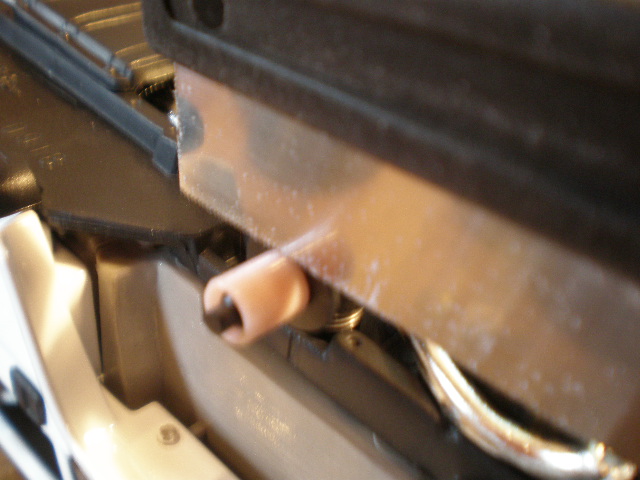
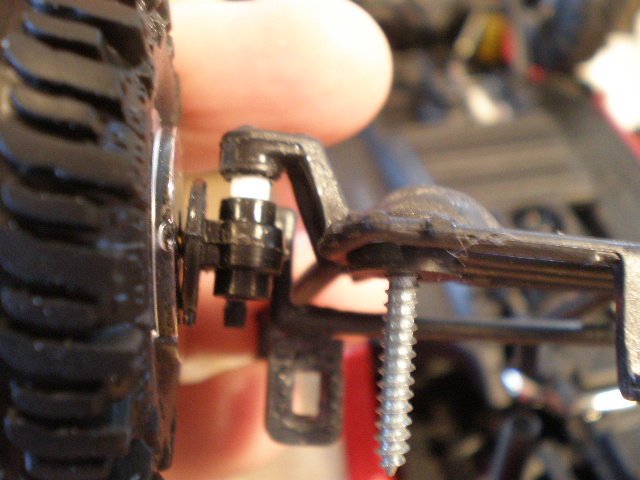
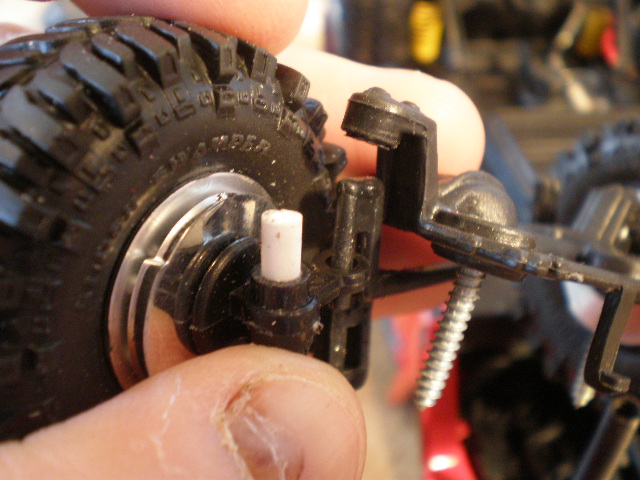
Note the white rods at the top (bottom) of the wheel hubs...?
These where added in to hold the springs in place.
Note: the yellow springs are from New Ray 1:12th scale Quad bikes and the front black springs are from a 1:24th scale monster truck toy.
You could probably do all of this in about 1\2 and hour to an hour, which makes it a nice easy modification with great looking results (IMO).
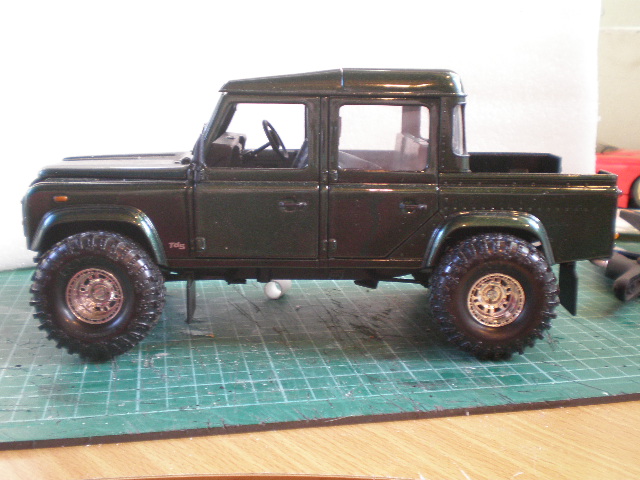
Now, you can fit other wheels the same way too. These are from a Universal Hobbies Land Rover 110 with different tires fitted:

And here is a set of the Super Swampers fitted to the UH Land Rover. The UH Land Rover wheels are screwed in so no modifications to the model are required:
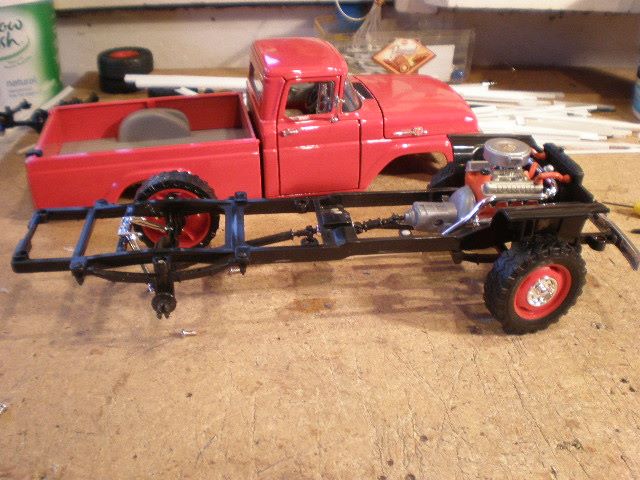
Here are the pictures on adding the same wheels to my Road Legends Ford F250 (1:18th scale).
You need to put the wheels off (carefully!).
Note the axle "stub" that the wheel attached to.
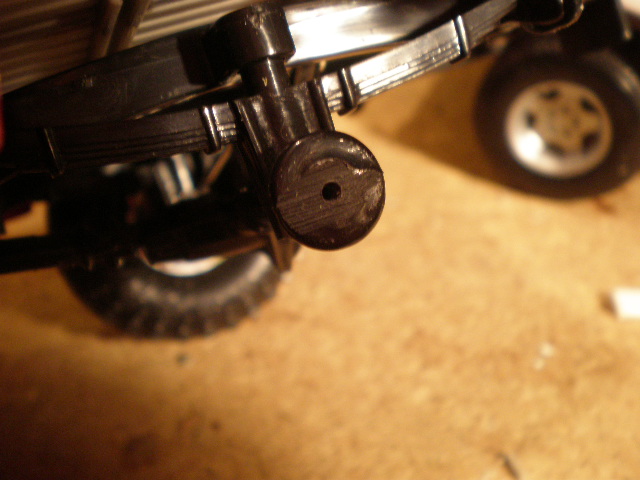
Here is the axle after the stub had been cut off.
This is the screw I will use to hold the tire on. It s a brass screw about 10mm long and 2mm wide.
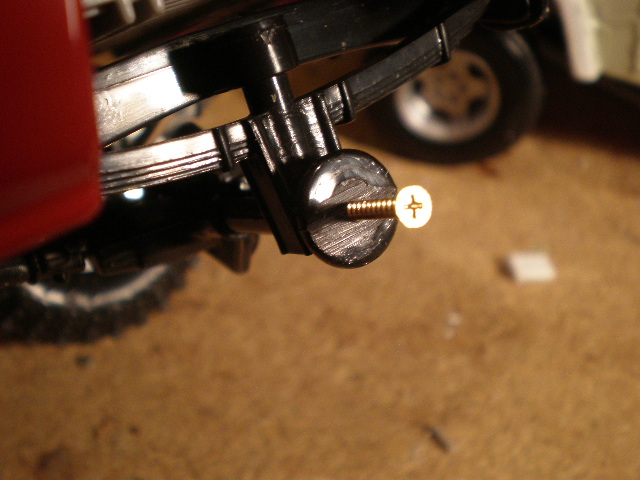
Screw through the tire (also showing the brake caliper from a custom wheel set).

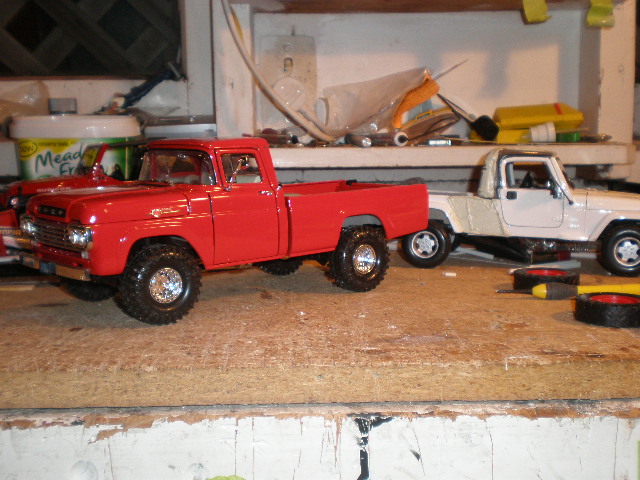
Final shot!
Well, that's all for now! Please ask if you have any questions.
cheers
Peter
In response to my post in the Complete 4x4 section of this forum (Modified Ford F250) I was asked to post a "how to" on fitting SoReal wheels (1:24th) to 1:18th scale trucks.
I have used the same method on Maisto Jeeps and Ertl/Anson Dodge Rams (all 1:18th scale).
As a "bonus" this also contains a how to on lifting !:18th scale Maisto Jeeps (works with other 1:18th scale models too).
I originally posted this on the diecastxchange website.
The short version is that you cut the axle stubs off, drill a hole in the "axle mount" then put the wheel on and use a screw to hold it there.
The wheels are from the SoReal company and are 1:24th scale. They do however look good on a 1:18th scale model. There are two main types of wheels that you can buy from SoReal:
Note: I don't think you can buy directly from the website. I got my from the Ebay retailer Trevors Toybox and found them good to deal with.
SoReal IROK Super Swamper on Weld Mountain Crushers (fitted to Jeep in picture below) and Interco TSL Bogger Swampers on BeadLock Wheels (to the left of the fitted wheel)
The dimensions are (from the SoReal website)
SoReal IROK Super Swamper on Weld Mountain Crushers
Height - 1.929"
Width - 0.82"
Axle Mount - 0.0885"
Axle - 0.19"
Brake rotor inside - 0.57"
Interco TSL Bogger Swampers on BeadLock Wheels
Height - 1.75"
Width - 0.67"
Axle Mount - 0.0885"
Axle - 0.19"
Brake rotor inside - 0.57"
The wheels have a hole through the centre and the "hub cap" can be removed by pushing a rod through the hole.
Here is me holding the "hub" after it has been removed
This is how to fit the wheels to an axle "system" where the wheel can be pulled off an axle stub as you might find in a Bburago, Maisto or Ertl type model (and many others too).
I will be showing how I fitted the wheels to a Maisto Jeep Wrangler, but you can use this method on other models as well. Some models in which the wheels are held on by screws, you may not need to modify the axle at all. For example on a Universal Hobbies Landrover model.
Firstly you need to remove the wheel. In a typing axle stub type system this usually means carefully pulling the wheel off by hand or prising it off with two screw drivers held behind the wheel. The main thing is not to snap the stub off, though in this case I am going to remove the stub anyway. If it does snap off in the wheel, you may not be able to use the wheel again or you will need to drill the stub out of the wheel.
In this case (for demonstration purposes) I removed the wheel from my other Jeep, but the center "tube" did not come off.
So, here the wheel has been removed from the rear axle:
Showing you where to cut with the saw. You want to leave the disk on the end of the axle:
If needed, "clean up" the cut to make it flat.
Then you drill a hole for a screw to go into. You need a screw long enough to go through the wheel hole into the axle and thin enough also to go through the hole. I am using screws that are a 1\2 inch long by 2mm wide. I drilled a hole about 1-1.5mm wide so the screw has some grip. You also should aim to drill in the centre of the disk.
I used a hand drill:
Hole in front axle. Be careful not to drill too far!:
Out the screw through the hole in the wheel:
Back of wheel for reference:
I have some brake discs from another set of custom wheels and these fit nicely into the back of the SoReal wheels. I am using them to help fill in some of the space at the back of the wheel, but they are not required.
Now screw the wheel onto the axle:
DO that another three times and you get something like this:
Now to lift the Jeep a bit (the photos above show it already lifted)
Firstly, a basic lift on a Maisto or similar "spring fitted" model can be done by just swapping out the screws that hold the axle parts on with longer screws and either fitting spacers and keeping the same set of springs, fitting two sets of springs (doubling them up) or fitting larger springs.
In these pictures you can see the four "chrome" screws holding the front and rear suspension on:
Front
Rear
The original screw is on the left and the replacement screw is on the right:
Here is the rear suspension with the replacement screws and new longer springs:
And the front with the same screws and different springs:
Note the white rods at the top (bottom) of the wheel hubs...?
These where added in to hold the springs in place.
Note: the yellow springs are from New Ray 1:12th scale Quad bikes and the front black springs are from a 1:24th scale monster truck toy.
You could probably do all of this in about 1\2 and hour to an hour, which makes it a nice easy modification with great looking results (IMO).
Now, you can fit other wheels the same way too. These are from a Universal Hobbies Land Rover 110 with different tires fitted:
And here is a set of the Super Swampers fitted to the UH Land Rover. The UH Land Rover wheels are screwed in so no modifications to the model are required:
Here are the pictures on adding the same wheels to my Road Legends Ford F250 (1:18th scale).
You need to put the wheels off (carefully!).
Note the axle "stub" that the wheel attached to.
Here is the axle after the stub had been cut off.
This is the screw I will use to hold the tire on. It s a brass screw about 10mm long and 2mm wide.
Screw through the tire (also showing the brake caliper from a custom wheel set).
Final shot!
Well, that's all for now! Please ask if you have any questions.
cheers
Peter


