|
|
Post by coopdad on Feb 4, 2010 20:44:23 GMT -5
For those that are not into Broncos, Big Oly was the first ground up, purpose-built vehicle for desert racing, sorta like Trophy Trucks today. It went on to win the '71 Baja 1000 (in record time) and '72 Baja 500 and 1000s in the hands of Parnelli Jones co-driven by Bill Stroppe. 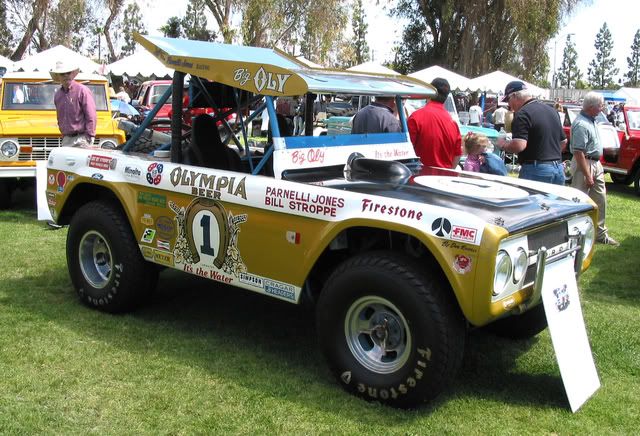 The project has been a veeeeeeery slow process. There is no kit available so the basic body was borrowed from a toy bronco pretty easily found on eBay. It measures out to be almost exactly 1:24. BUT it is made from that rubberery plastic that nothing will stick to: glue, paint, etc. So, I am molding/casting the body panels I need.  I have the grille, sides and hood ready to pour in resin. Since on the real racer nothing else from the Bronco is the same, I am not bothering with the other parts like tailgate. The rest of the parts for the truck will be borrowed from Mustang and Bronco kits. Surprisingly, I will only need the 9" rear end as the real truck was "only" 2 wheel drive! The cage will be a fun challenge. 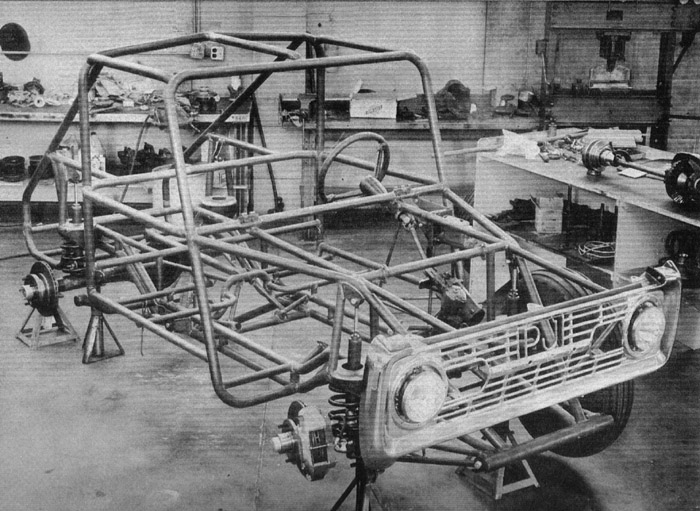 The casting of the body panels has been frustrating to say the least. It took about four tries to get a set that was usable. 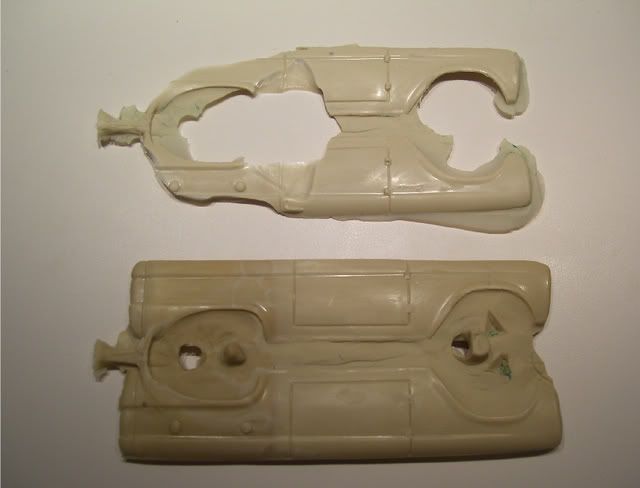 The top one was the first try, the bottom the fourth. The first attempt had the filler hole clog because I was pouring too slowly (the resin I am using starts to solidify very quickly, anywhere from 30 seconds for small parts and maybe a minute for thick parts). Anyway, I should be able to use the front fender flairs on the rear. They are the same in front and back. First order of business is to "channel" the body, after straightening the panels and removing badges/gas caps/door hinges. I found out that the real truck was 3" shorter. The body was cut just below the lip that runs the length. So, the fender flair should start slightly above that lip on the racer. 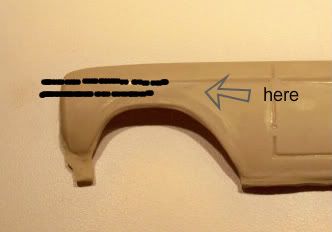 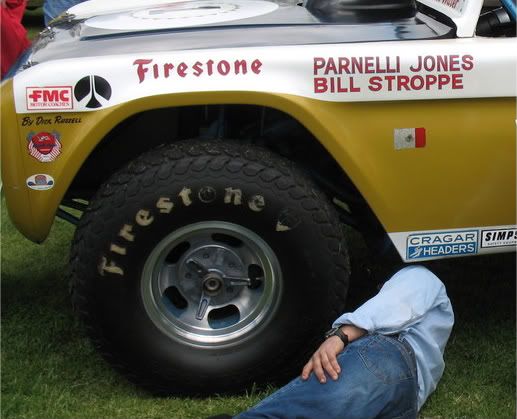 The hood came out very clean only requiring minor tweaking and filling of the vent holes before cutting the hole for the carb to stick up.  John |
|
|
|
Post by jeffs396 on Feb 5, 2010 1:34:32 GMT -5
Looking good John! Can't wait to see it finished! Sure wish a kit manufacturer would step up with an early Bronco kit  |
|
|
|
Post by wtsf150 on Feb 5, 2010 6:44:47 GMT -5
Love the work your putting into this John I too would love to see the older Bronco released as a kit or even the late 80's and the last of the big Bronc's the mid 90's models
Willie
|
|
|
|
Post by coopdad on Feb 13, 2010 8:27:09 GMT -5
Yes, very surprising that nobody ever make a kit. There were rumors that Tamiya was going to have one... they were spotted at a huge auto show in SoCal measuring and photographing an EB but sadly, the result was only a RC body. Next set of photos... First the channeling (if that is what you call it) and narrrowing of the body. I needed to reduced by 3 scale inches and found that my table saw blade was about 3 mm. So... 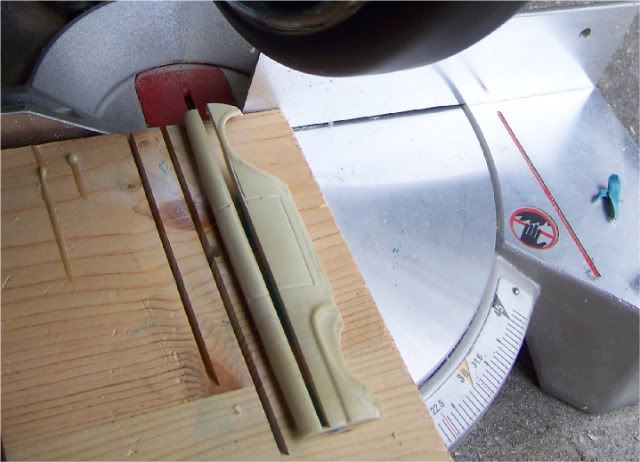 And the hood received the same treatment: 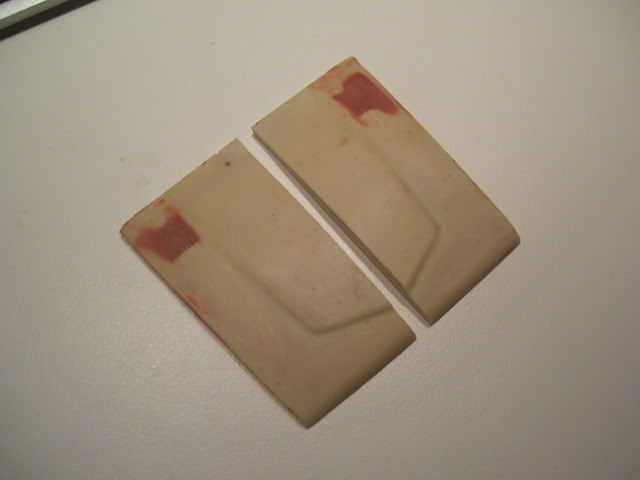 glued together: 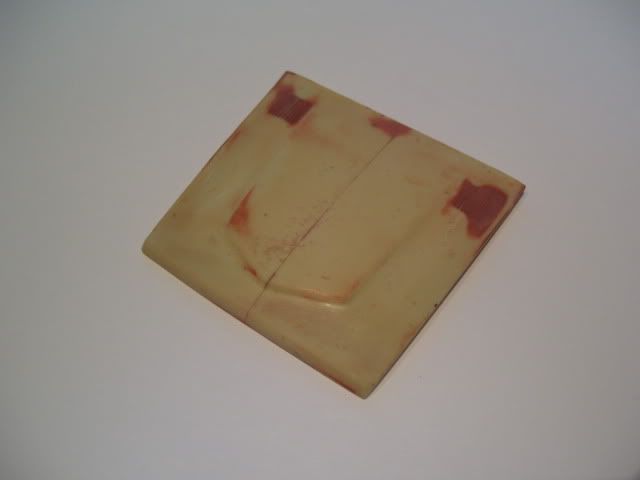 After supergluing together (sorry, no photo) I realized the fender flares were no where near what the real truck has so I cut these out so styrene and superglued on: 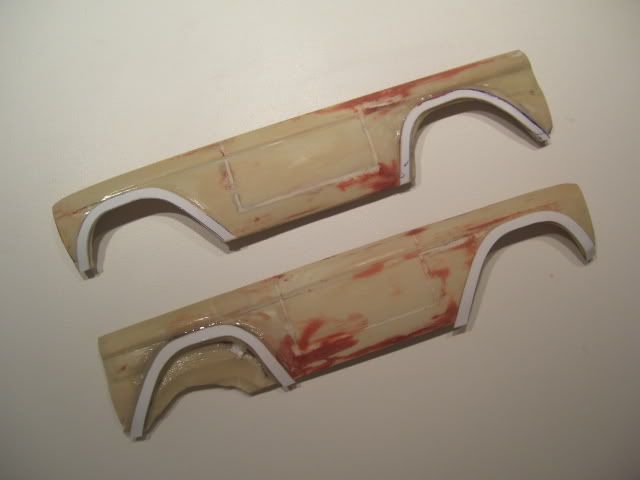 After A LOT of work sanding, shaping, filling, filing the flares look much closer... we will see after I get some primer on. 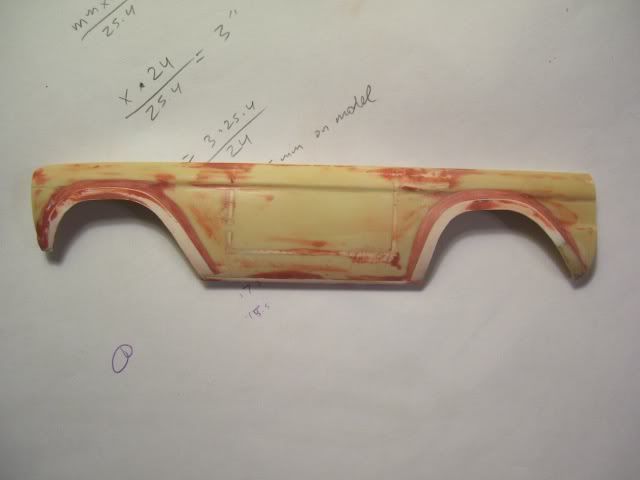 The ends of the body at the bottom required 2-3 days worth of the same treatment to get everything lined up and curved right. 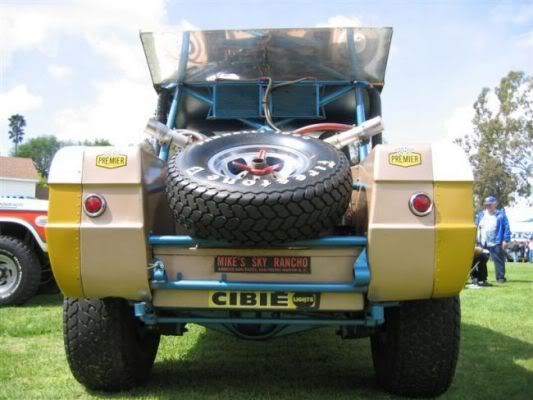 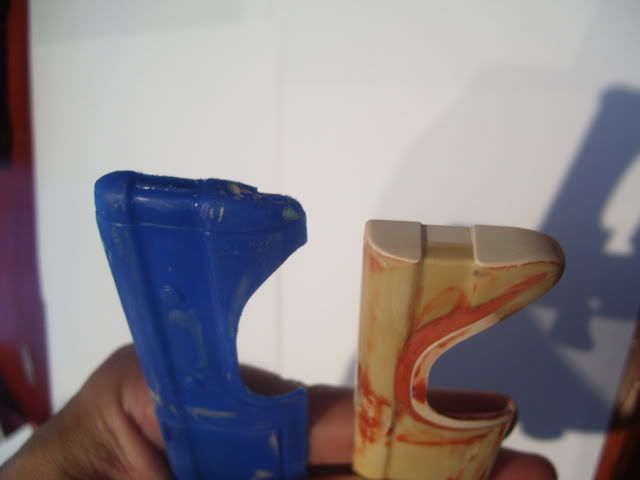 Let me know if you have any questions. John |
|
|
|
Post by coopdad on Feb 13, 2010 8:28:17 GMT -5
At the same time working on the sides I have been working on the grille. How they both line up is critical to making it look like a hack job... so I spent a lot of time on that also. The grille itself on the toy was nowhere near the same as the real truck. I pretty much threw it out using it only for the shape: 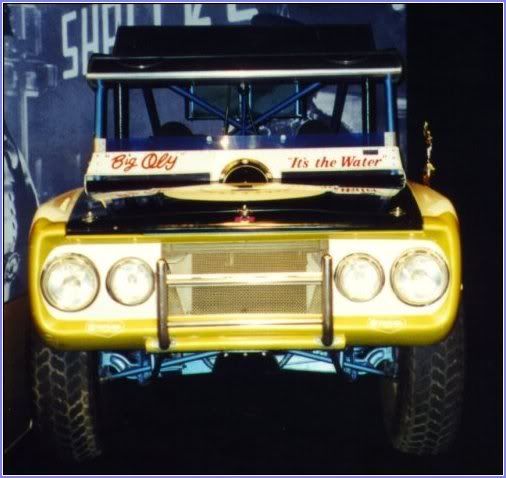 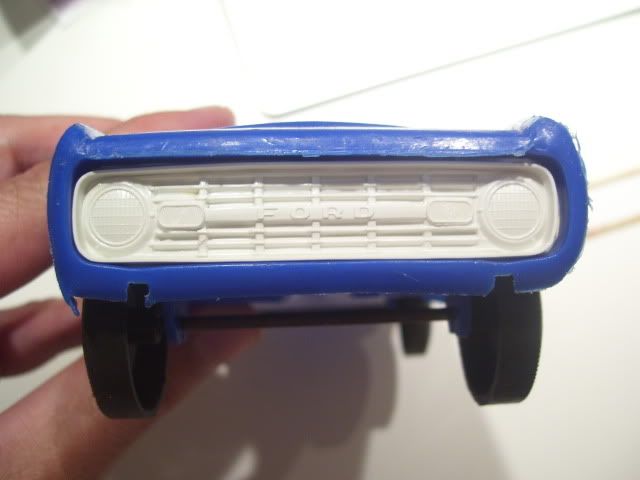 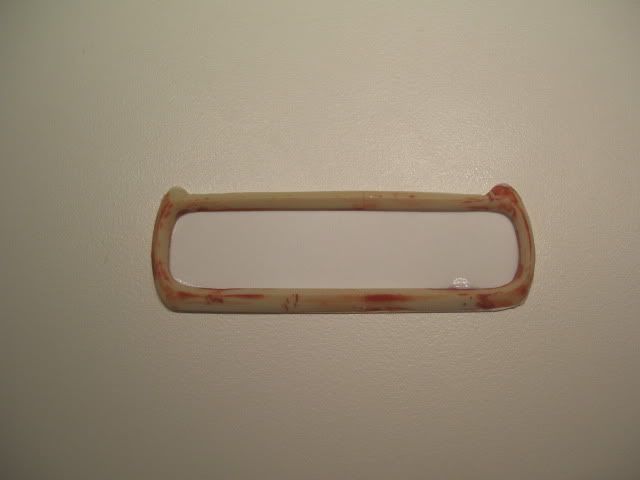 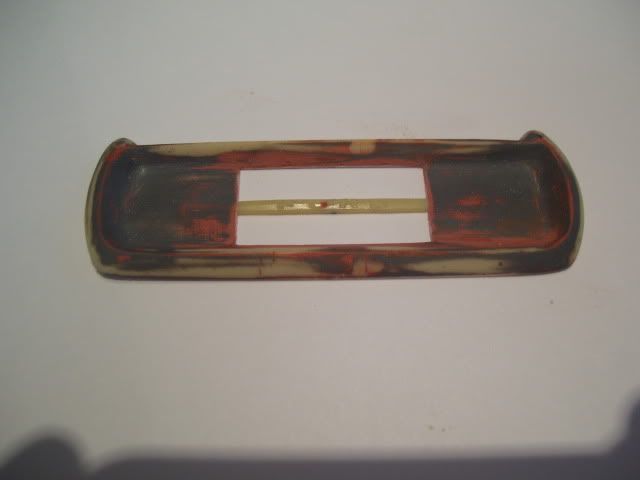 It is pretty much on hold until I find lights and the mesh stuff to fill the radiator hole (maybe Home Depot will have some sorta filter materal. Faucet screen looks very close.) The math says the larger light is about a 13-15" light and the smaller about 10". I am guessing the smaller one is actually the factory 8". No idea where to find lights. John |
|
|
|
Post by jeffs396 on Feb 13, 2010 13:48:22 GMT -5
|
|
|
|
Post by coopdad on Feb 13, 2010 20:20:45 GMT -5
You know Jeff, I searched and searched my parts box with no luck. And if I did find them, what are the chances that both sets would look right? I came up with another option for lights. In many of the races Oly ran these strange light covers. As best I can tell they were an egg shaped wire frame with some sorta cloth covering. This photo shows them though I have others that it is much more obvious that it is fabric. 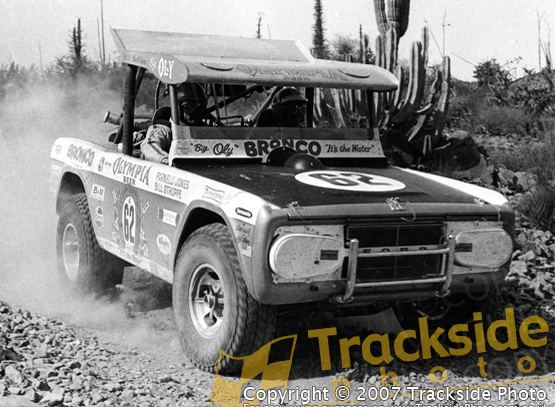 I feel these covers will probably be a better option since they will add another of the very unique visual features that the truck had. So I fabbed them up. Started with the oval shape styrene and laid it on crinkled aluminum foil. Then filled it with white glue. After it dried it had this droopy cloth-like feel to it.  Yes, Jeff, if you don't mind taking a photo of the mesh. The stuff I have I think is from Home Depot... kinda looks like faucet screen but in a larger silver sheet. It it is Stainless, are there any tips/tricks for coloring it black? Some sorta chemical process? John |
|
|
|
Post by jeffs396 on Feb 14, 2010 3:55:38 GMT -5
Wow John, nice job on those headlight covers, look just like the 1:1. But, I think you should model the exposed headlights, maybe have the covers on your display base/diorama... How did you do the push bar? Styrene? Alclad? Looks really nice! Here's a few mesh comparo pics... first, MCG-703 SS:  this mesh is from a SS kitchen spatter shield:  and together with a scale for size:  Not sure about blackening SS...the brass from MCG may be your best bet, as the SS pictured here looks a little fine for your application IMHO. The brass would probably be more receptive to blackening also (or paint). I was also looking thru my kits, came up with these lights for size comparison... this is an AMT 1970 Monte Carlo headlight (.281") with a Monogram 1932 Ford Roadster headlight (.344"):  this is a matched set from a Johan 1931 Caddy...driving light (.281") with large headlight (.406"):  Hope this helps! |
|
|
|
Post by coopdad on Feb 16, 2010 23:44:13 GMT -5
Yes, I have to agree, the covers are pretty ugly. But after doing a TON of research, I have chosen to build the Oly that ran at the 1972 Mexican 1000. It had the covers (until they were knocked off).
I have not yet tried Alclad. The stuff is Krylon Metallic spray. It is far from Chrome as the cap shows but will work ok for this bumper (styrene rod). The wing was going to be another thing. It would have to be very shiny chrome, like Alclad would produce. But I found this stuff at a hobby store in Atlanta. It is very thin chrome sheet with self stick backing. It is used for airplane modeling on the leading edge of wings so it is very tough. We will see how well it sticks.
John
|
|
|
|
Post by coopdad on Feb 21, 2010 19:19:49 GMT -5
Since my wheels will be arriving soon so I am now focusing on that area of the project. The tires I have are very soft rubber and I noticed when I squeezed them, they looked like they could pass as the real thing...at least from a distance.    BUT I need help. Does anyone have any ideas for what I can put inside to "puff" them out? Thanks! John |
|
|
|
Post by jeffs396 on Feb 22, 2010 20:48:52 GMT -5
Hey John, I played around with the squishy Goodyears here...I tried foam backer rod (for caulking large joints), worked OK, but probably not "inflated" enough. Also inserted a plastic cabinet knob that was just a bit larger than the OD of the tire, that "inflated" it nicely with a crown in the middle of the tread, but still wasn't quite right as the sidewalls were "deflated" due to the stretch of the carcass. Experiment, experiment, experiment!  |
|
|
|
Post by coopdad on Feb 23, 2010 19:59:17 GMT -5
Yes, got to do a lot of trying things. Anyway, I thought I would give an update... the building the basic cage in the interior. Everything seems to hang of it so start there.  Skip ahead... Suspension is now in; 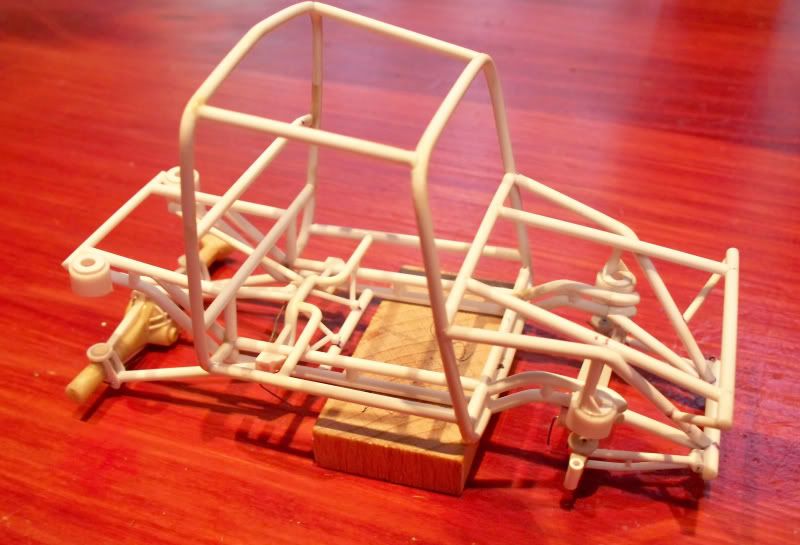 and then the rear cage, rear area and interior: The floor and firewall is almost done. I will have to lower the motor mounts as the cam covers will hit if left as high as it is now.  Then test fitting the wing and body panels:  What is interesting is that I almost feel like I a building the real thing... finding problems that they found while building the real truck. For instance if you notice the top for the rear hoop in the first photo it has the signature "Stroppe Bronco hump". When I got to putting the wing on I could see no way that it would fit if the hump was there. Then found photos of the cage when they were putting on the wing and they had flattened it too. |
|
|
|
Post by coopdad on Feb 23, 2010 20:04:36 GMT -5
On to the rear of the car: Added the radiators, and fuel fullers.  I have braided lines and vent hoses ready to put on too. So, I have finally gotten the thread up to present day... This is what I have made: 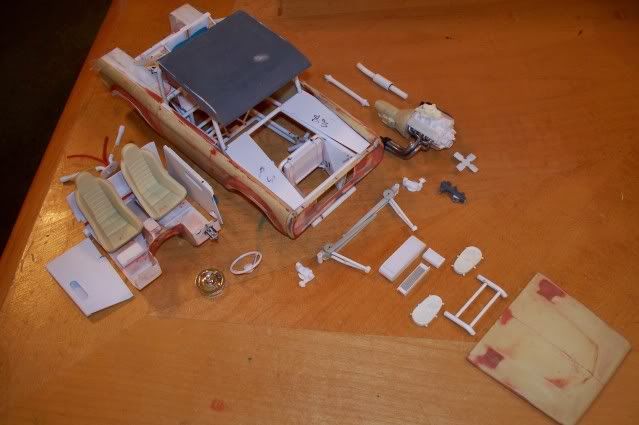 Can't wait to get some paint on and get it to look like something more than plastic. John |
|
|
|
Post by coopdad on Feb 23, 2010 20:08:13 GMT -5
Oh yea, finished up the decals:  Why do I have multiples of such items as tachometers? I have found that no matter how good I measure, things never end up exactly the right size as the part. So, I have a couple choices in trying to get it perfect. Plus, the ones that don't fit I throw into my spares box for future projects. Can finally feel an end in sight. |
|
|
|
Post by Big Ed on Feb 23, 2010 20:30:01 GMT -5
John, your scratchbuildin' amazes me. I truly enjoy lookin' at your work. That cage is slick.
|
|